Homemade Sauerkraut – Details instructions and resources
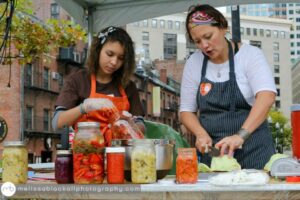 Here is a detailed sauerkraut recipe to accompany sauerkraut workshop instructions.
Enjoy!
Homemade Sauerkraut
Ingredients:
Cabbage
Salt (sea salt or kosher salt, non-iodized)
Optional: Carrots, turnips, rutabaga, fennel, radishes, winter squash or other vegetables. Not recommended: potatoes, eggplant, sweet potatoes, yams, cucumbers (save these for pickles), summer squash, zucchini
Equipment:
Canning Jars
Big, non-reactive bowls
Sharp knives
Optional: a tamper (I like using a cocktail muddler)
Procedure:
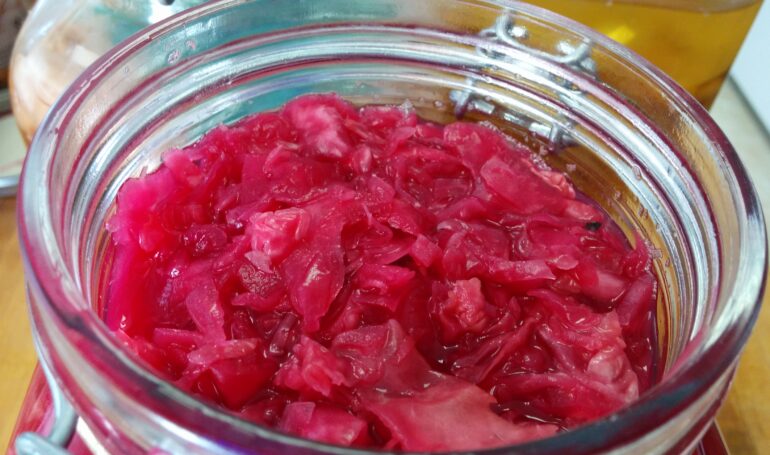
- Chopping: Chop the vegetables to the desired coarseness for your sauerkraut. Separate the leaves. I typically prefer a finer sauerkraut, so I chop my cabbage very thinly. The finer the vegetables are chopped the easier it will be to extract water from the vegetables during the bruising step.
- Salting: Sprinkle salt over the cabbage. I use about 2 tablespoons per head of cabbage, but you can use up to 4 tablespoons.
- Why salt? The family of bacteria responsible for fermenting the vegetables, lactobacillus, survives a saline environment. As the lactobacillus eat the starches in the vegetables, they expel CO2 in the process. This imparts a sour flavor to the vegetables and increases the acidity of the liquid. The saline environment also protects the vegetables from decaying or rotting because the bacteria responsible for decay and rot do not thrive in saline. A minimum saline solution of 2% by weight of water is suggested for fermentation. Since we are using the liquid from the vegetables, the measurements given are approximations, but aiming for more than 2%
- Bruising: This is the fun part! Using your hands, start squeezing and pounding the vegetables to bruise them and release the water. It will be tough at first, but as the water starts being released, it will get easier. This will take some time. The end result will be a puddle of liquid at the bottom of the bowl.
- Tasting: Taste your sauerkraut as you are bruising it. It will be like a salty coleslaw. The saltiness will mellow out over time. If the solution is not salty enough, decay and mold will result. If the solution is too salty, the lactobacillus will not survive. However, they do survive over a wide-range of salinity. If the sauerkraut ends up too salty after fermentation, it can be rinsed before eating.
- Packing: Pack the cabbage into jars. It is important to pack the cabbage tightly and push out all the air. Air pockets will allow other bacteria to survive. As you are packing, the liquid will continue to be expelled. The goal is to have enough liquid above the solid vegetables to keep the vegetables fully submerged.
- Weighing: For best results, leave a half an inch or more of liquid above the vegetables and an inch or more of headspace above the liquid. It can be more of less according to your preference and weighing method. Weigh down the vegetables to keep them submerged during fermentation.
- Submersion: any vegetables that are exposed to air run the risk of rotting and being a source of mold. It is important for the vegetables to remain submerged during fermentation. Vegetables want to float
- Weights: Fermenters get creative about weighing down their vegetables. There is no one right way to do this, but here’s some ideas
- A baggie of washed pebbles or aquarium pebbles
- A baggie of 2% saline (use saline incase the baggie breaks)
- A smaller jar filled with saline
- Glass weights (Here’s one version on Etsy, but there are others)
- ceramic weights (here’s one version on Etsy, but there are others)
Remember, you don’t need anything fancy or expensive; you just need to keep the solids under saline!
- Waiting and Burping: Now, it is time to wait for the lactobacillus to do its work. Store your jar in a cool place out of direct sunlight. I have stored mine on the counter throughout the summer, so the temperature range is pretty wide. However, the warmer it is, the faster the souring. Also, sauerkrauts will taste differently in different seasons; this is partly because of temperature and partly because of wild yeasts available. How your sauerkraut waits depends on preference, but here’s some options
- Burping : Tighten the lid on your jar completely and ‘burp’ the jar once or twice a day. As the or you might have an explosive mess on your hands. Burping regularly also allows you to check fluid levels regularly.
- Unsealed Jars: To avoid the explosiveness predicament and to eliminate the need to remember to burp every day, you can simply use a loose lid or even just a piece of fabric held on with a rubberband. The gases release on their own, but sometimes you forget that sauerkraut is on the counter until weeks later. The liquid also evaporates more quickly with this method. For me, I also tend to get a kahm yeast layer on top of the liquid more easily with this method.
- Airlocks: You can buy or make airlock adaptors for canning lids that eliminate the need for daily burping, minimize evaporation and even reduce the kahm yeast growth. Here is one version on Etsy, but there are others. If you are handy with a drill, these can easily be made.
- What is Kahm Yeast? When you ferment, a cloudy and scummy layer will sometimes form on the surface of the liquid. This is likely kahm yeast which forms on the surface as the solution gets more acidic. It can look like mold and be a little scary, but kahm is a byproduct of fermentation. It can be skimmed off and the ferments below eaten. If it has fuzzy patches or is green/blue, it is mold and should be discarded.
- Tasting: You can start tasting your ferment within the first week. It is fun to test out the ever evolving flavors in a ferment. As the acidity changes, the flavors change due not only to the acidity, but also to the changing nature of the bacteria. Different lactobacillus survive at different acid levels. Personally, I have let ferments go as long as 8 weeks (that forgotten jar with an airlock on the counter). I like a 6 week fall ferment, but it is your preference. After 8 weeks, the flavors get a little to funky for my palette.
- Refrigerate : Once the sourness and flavor are to your liking, tighten the lid and put the jar in the fridge. The lactobacillus will go dormant or slow down in the cold environment. You can store it there for many more months. The National Center for Food Preservation has recommendations for storage, water bath canning and other preservation methods. I cannot recommend dates or methods outside of their guidelines, but many fermenters have their own personal methods.
- Eat!
Resources
- Books:
- Sandor Katz’s Wild Fermentation: The Flavor, Nutrition, and Craft of Live-Culture Foods is considered one of the best resources with recipes, stories and history. Great for beginners. For more history and culture, check out his The Art of Fermentation.
- Real Food Fermentation: Preserving Whole Fresh Food with Live Cultures in Your Home Kitchen by Alex Lewin.
- Mastering Fermentation: Recipes for Making and Cooking with Fermented Foods by Mary Karlin.
Online
Leave a Reply